

When people start planning their first DIY lampshade, they spend hours choosing the perfect fabric. They agonise over the frame size. They research backing materials. But there’s one component that quietly determines whether the finished shade looks polished or falls apart — and most beginners never think about it until something goes wrong.
It’s the tape -the most important part of making a long lasting lampshade..
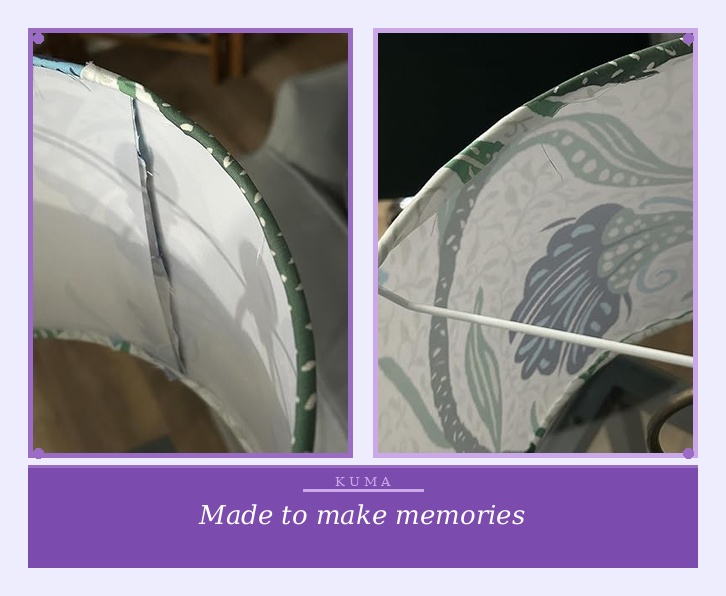
Table of Contents
What Is Lampshade Tape and Why Does It Matter?
Lampshade tape is a double-sided self-adhesive fabric tape used to bond the fabric edges to the top and bottom rings of a lampshade. It’s the join that holds everything together — and the part that takes the most stress during both assembly and everyday use.
Get the lampshade tape right, and the fabric sits cleanly against the ring with no lifting, no gaps, and no shifting. Get it wrong, and even the most beautiful fabric choice won’t save the finished result. Loose edges, separating seams, and fabric that bubbles away from the ring are all signs that the wrong adhesive fabric tape was used — or that it was applied unevenly
Why Regular Tape May Not Work
This is the mistake almost every beginner makes. Hardware store tape is too thick and leaves a visible ridge under the fabric. Regular craft tape isn’t heat-resistant and will weaken over time as the bulb warms the shade. Binding tape designed for other purposes doesn’t have the flexibility to follow the curve of a lampshade ring without bunching or lifting at the edges.
Lampshade making needs a very specific type of material tape — thin enough to be invisible, strong enough to hold permanently, heat-resistant enough to cope with a warm bulb, and flexible enough to curve smoothly around a ring without distorting.
Why We Recommend Tesa 4965
Tesa 4965 is the self-adhesive textile tape that professional lampshade makers and experienced DIY crafters reach for worldwide. It’s a German-engineered double-sided transparent PET film tape with a modified acrylic adhesive, and it has become the industry standard for lampshade making, trusted by manufacturers and home crafters alike for years.
What makes Tesa 4965 stand out is its combination of properties that matter specifically for lampshade making. It withstands temperatures up to 200°C, which means the heat from a bulb will never compromise the bond. It has an initial adhesion of 11.5 N/cm — strong enough to hold fabric permanently to a metal ring without any additional adhesive. And it’s completely transparent, so it will never show through lighter fabrics.
Most of lampshade material suppliers recommend Tesa double-sided lampshade tape in all of their lampshade making kits and describes it as their go-to recommendation for securing both seams and fabric edges to rings. Their lampshade maker community consistently rates it as the most reliable tape for the job — whether making one shade at home or producing professionally to sell.
It’s not the cheapest tape on the market. But it’s the one that works — consistently, cleanly, and permanently. Once you’ve used Tesa 4965, you’ll understand why experienced makers won’t use anything else.
Choosing the Right Width
Tesa 4965 self-adhesive ribbon tape comes in multiple widths, and choosing the right one matters.
9mm lampshade tape is the standard width supplied in most lampshade making kits. It’s ideal for shades up to 6inches (15cm) in diameter — narrow enough to follow the ring precisely and apply cleanly without overlapping onto the fabric face.
12mm self adhesive fabric tape is designed for larger shades over 6 inches in diameter. The wider bond gives extra hold and stability where the ring takes more tension from a larger, heavier shade.
Using 12mm tape on a small shade makes it harder to apply neatly. Using 9mm on a large shade risks the bond failing under tension. Width isn’t a detail — it’s part of getting the result right.Tesa self-adhesive ribbon tape comes in two widths, and choosing the right one matters
How to Apply Lampshade Tape Correctly
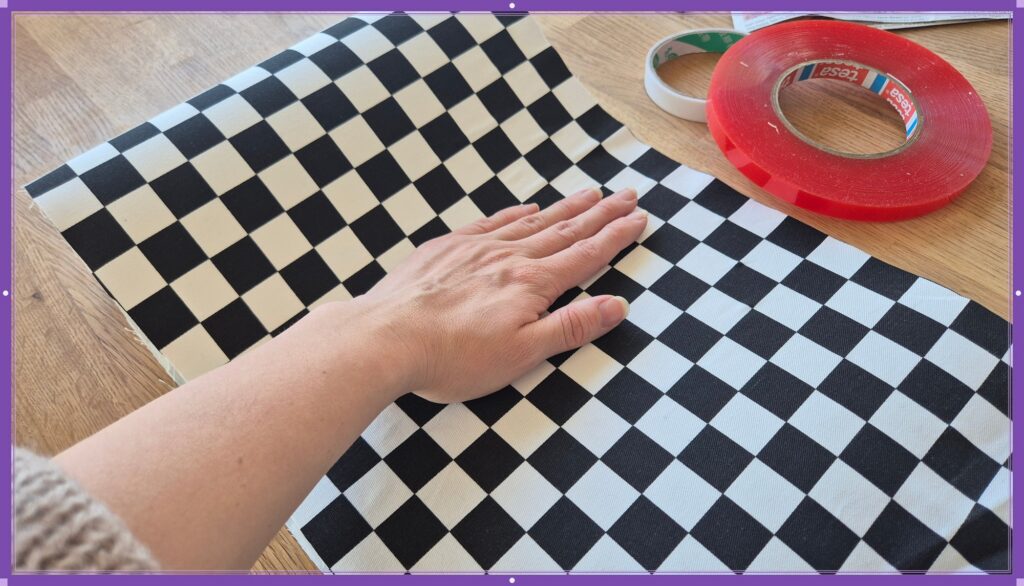
Even the best textile tape won’t perform well if it’s applied carelessly. Follow these steps for a clean, lasting bond:
1. Work in a warm room — We recommend between 15 and 30 degrees Celsius – normal room temperature. The adhesive on self-adhesive fabric tape won’t bond properly in cold conditions.
2. Make sure your surface is clean and dry before applying the adhesive lampshade tape to the ring.
3. Apply the Tesa 4965 directly to the lampshade ring, keeping the ring centred along the lampshade tape width as you work around the curve.
4. Leave a small gap of approximately 3mm where the two ends of the tape meet — this prevents a visible bulge at the seam point.
5. Once the tape is fully applied, peel the backing paper and press the fabric edge firmly and evenly, working in one direction all the way around.
6. Place the shade on a clean flat surface and use a seam roller to apply firm, even pressure along the join — this ensures a strong, consistent bond all the way around.
The most common mistake is rushing this step. The tape application takes perhaps five minutes — but it determines the quality of everything that follows.
Beyond the Rings: Other Uses for Lampshade Tape
Tesa double-sided tape has uses beyond just bonding fabric to rings. Lampshade making community also uses it for closing the vertical seam where the two ends of the panel meet, for adding bias tape as a decorative trim to the top and bottom edges of a shade, and for attaching lightweight trims and ribbons to the outside of finished shades.
For trickier fabrics — velvet, silk, or heavily coated materials — We recommend testing the tape on a small sample first, as some fabrics with silicone or stain-resistant treatments can resist adhesives. In these cases, a seam roller and additional pressure time make a significant difference to the final bond strength.
Can Lampshade Repair Tape Fix an Existing Shade?
Yes — and this is one of the most underused applications. If you have a broken lamp shade where the fabric has lifted or the seam has separated, good quality lampshade repair tape can restore it completely. Remove any old adhesive, apply fresh Tesa 4965 self-adhesive textile tape to the ring, and press the fabric back down firmly using a seam roller. In most cases the repair is invisible and the bond is stronger than the original.
It’s a much better option than throwing away a shade you love — and takes less than ten minutes.
Where to Get Tesa 4965
Tesa 4965 is widely available and easy to source. The most convenient option for most makers is Amazon — search for “Tesa 4965 double sided tape” and you’ll find it in the right width for lampshade making. Make sure to check that it’s the genuine Tesa branded product and not an unbranded alternative, as the quality difference is significant.
It’s also available through specialist tape suppliers and craft stores in various countries.
What About Spray Adhesive and E6000?
Some makers use spray adhesive to bond fabric to the backing, followed by E6000 glue along the top and bottom rings and the vertical seam. It works — and for certain fabrics it can give a strong initial bond.
But there are a few reasons professional makers move away from this approach over time.
Spray adhesive is difficult to control. It mists beyond the area you need, can seep through lighter fabrics, and leaves a sticky residue that attracts dust. E6000 is a strong contact adhesive but it dries rigid — it doesn’t flex with the lampshade over time, which means edges can crack and lift, especially with heat from the bulb.
Tesa 4965 double-sided tape is flexible, heat-resistant, and applies exactly where you need it — no mess, no overspray, no waiting for glue to cure. It’s why professional lampshade makers switched to it, and why it’s become the industry standard.
Both methods get the job done. But one of them is significantly cleaner, more predictable, and longer lasting.
No responses yet